In this Article
If you’ve been debating whether the Philips Barista Brew semi-automatic espresso machine is worth your money, let me save you the hours of research I’ve already done. I’ve tested this machine back-to-back with the Breville Barista Express, pulled well over a hundred shots through it, and made every mistake a beginner can make — so you don’t have to.
The short answer? For most home coffee lovers who want genuine café-quality espresso without climbing the steep learning curve of a fully manual machine, the Philips Barista Brew (model PSA3218/01) is one of the strongest options on the market right now. But it’s not perfect — and you deserve to know exactly what its flaws are before you spend close to $480.
Let’s dig in.
What Is the Philips Barista Brew?
The Philips Barista Brew is a mid-range, semi-automatic espresso machine with a built-in conical burr grinder, PID temperature control, automatic pre-infusion, and a 58mm stainless steel portafilter. Philips launched it in the US market in July 2024, making it the brand’s first-ever semi-automatic espresso machine — a notable step for a company that had previously focused entirely on super-automatic machines like the Philips 3200 and 5400 series.
It’s designed to sit at the sweet spot between a beginner pod machine and a fully manual espresso setup — giving you real control over the grind and extraction while automating the parts that trip most people up.
If you’re already exploring what kind of espresso machine is right for your skill level, this review will help you figure out exactly where the Barista Brew fits.
Full Specifications at a Glance
| Spec | Detail |
| Model | PSA3218/01 |
| Machine Type | Semi-automatic espresso machine |
| Dimensions | 16.14” L × 12.6” W × 13.15” H |
| Weight | ~18.95 lbs |
| Wattage | 1,350 watts |
| Pump Pressure | 15 bar |
| Portafilter Size | 58mm stainless steel |
| Grinder Type | Built-in metal conical burr grinder |
| Grind Settings | 15 (superfine to coarse) |
| Bean Hopper Capacity | 250g |
| Water Tank Capacity | 2.3 liters (77.8 oz) |
| Milk Jug Capacity | 450ml (15.2 oz) |
| Max Cup Height | 95mm (3.74 in) |
| Noise Level | ~78 dB |
| Warranty | 2 years |
| Retail Price | ~$479.99–$649.99 (check current price) |
| Colors Available | 4 color options |
Design and Build Quality
When the Barista Brew first arrived on my counter, my immediate reaction was: this looks like it means business. The brushed stainless steel body is anti-fingerprint coated — which sounds like a small thing until you realize you’ll be touching this machine multiple times every morning. No smudgy mess. Big win.
The machine has a compact footprint at 12.6 inches wide, so it tucks under kitchen cabinets without issue. It’s not lightweight at nearly 19 lbs, but that heft actually makes it feel solid and stable while you’re tamping.
A couple of design quirks worth noting:
- The water tank sits at the back of the machine and has a narrow shape. It holds an impressive 2.3 liters — I easily made five to six drinks before needing a refill — but cleaning inside the tank thoroughly takes some effort.
- Maximum cup clearance is 95mm (about 3.74 inches). That’s just enough for a standard espresso cup or small latte glass, but if you’re a fan of tall travel mugs, you’ll need to brew into a smaller vessel and transfer. There’s an included espresso stand for smaller cups, which is a thoughtful touch.
- The black plastic accents around the buttons feel a bit cheap compared to the premium metal body. It’s a minor cosmetic complaint, but noticeable when you’re putting this next to something like a Sage Barista Pro.
That said, the overall aesthetic is clean, modern, and professional — it genuinely looks like a machine that costs more than it does.
Key Features Explained (The Ones That Actually Matter)
58mm Stainless Steel Portafilter
This is a bigger deal than it sounds. Most espresso machines at this price point use a 54mm portafilter. The Barista Brew gives you a professional-grade 58mm portafilter — the same size used by most commercial café machines — which provides more even water distribution across the coffee puck, better extraction consistency, and ultimately a richer, more balanced espresso.
When I swapped from a machine with a 54mm basket to this one, the difference in crema thickness and flavor balance was immediately obvious. It’s not a subtle improvement.
The portafilter comes with four filter baskets: pressurized (dual-wall) and non-pressurized (single-wall) versions for both single and double shots. If you’re a beginner, start with the pressurized baskets — they’re more forgiving of uneven tamping. Once you’ve dialed in your technique, switch to single-wall baskets for more nuanced, café-level extractions.
A dosing funnel (powder ring) is included to direct grounds straight into the basket with minimal mess. I was genuinely impressed Philips included this — it usually costs $15–25 as an aftermarket accessory.
Built-In Metal Conical Burr Grinder
The integrated grinder is one of the Barista Brew’s strongest selling points. Having your grinder and espresso machine as one unit means freshly ground beans go directly into the portafilter every single time — no staling, no transfer mess.
The conical burr grinder offers 15 grind settings (adjusted by rotating the bean hopper) from superfine to coarse. For most espresso extractions, you’ll land somewhere in the finer range — Philips themselves recommend around setting 4 as a starting point for espresso.
Honest caveat: Reviewers — including myself — have noted that 15 settings isn’t a huge range. If you’re a seasoned home barista who likes to tweak grind size in tiny increments to chase specific flavor notes, you may find these steps a bit coarse (no pun intended). The Breville Barista Express has 16 settings and tends to offer slightly finer control at the lower end of the dial.
Also: the default dose setting grinds more coffee than most baskets need. I had to reduce the grind time by about half when I first set it up. Read the instruction booklet and adjust the dose before your first shot — it’ll save you a lot of wasted grounds and confused extractions.
One more note: the grinder is louder than you’d hope. At around 78 dB, it produces a high-pitched whine during grinding. Not a dealbreaker, but if you share a house with light sleepers, early-morning espresso sessions may cause some friction.
PID Temperature Control
PID stands for Proportional-Integral-Derivative — it’s essentially a precision temperature regulation system borrowed from industrial applications. What it means for your coffee is simple: the water temperature stays exactly where you set it throughout the extraction, preventing the swings in temperature that cause under-extracted (sour) or over-extracted (bitter) shots.
The Barista Brew gives you three temperature settings: low, medium, and high. I found the default (medium-high) slightly too hot for lighter roast beans — dialing it down to medium gave noticeably sweeter, more complex shots. Darker roasts tend to prefer lower temperatures too, to avoid bitterness.
Access the temperature settings by following the hidden programming sequence in the instruction booklet. It takes about 30 seconds once you know what you’re doing.
Automatic Pre-Infusion
Pre-infusion is one of those features that separates good espresso machines from great ones. Before the full 15-bar pump kicks in, the Barista Brew gently saturates the coffee puck with low pressure for a few seconds. This allows the grounds to bloom evenly and prevents “channeling” — where high-pressure water blasts through weak spots in the puck, extracting unevenly and producing a flat, underwhelming shot.
This feature is automatic and non-adjustable, which is fine for most users. The results speak for themselves: consistently even extraction, better crema development, and a noticeably more balanced flavor profile.
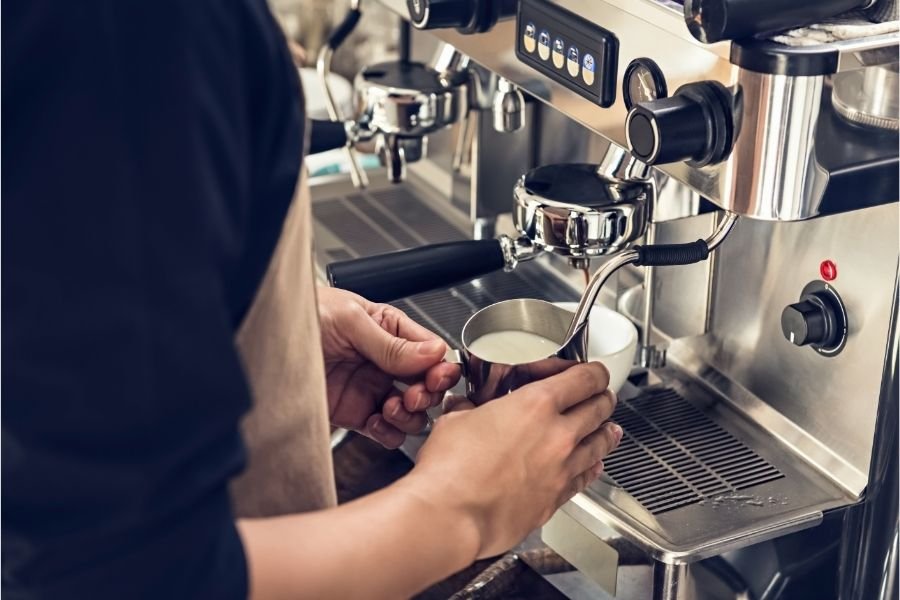
Steam Wand and Milk Frothing
Here’s where I’ll be blunt: the steam wand requires patience and some practice. It’s not the machine’s strongest point.
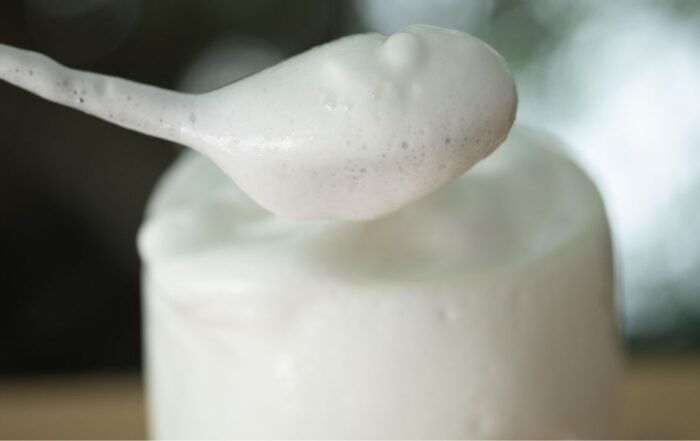
The Barista Brew includes a 450ml stainless steel milk jug with a clever temperature indicator strip built into the side — when the color changes, your milk is at the optimal frothing temperature (around 60–65°C / 140–150°F). This is actually a brilliant beginner-friendly addition that takes the guesswork out of the most temperature-sensitive step in latte making.
However, the wand itself is a bit fiddly. Getting the angle right to create silky microfoam — rather than big, airy bubbles — takes some trial and error. I’d estimate it took me about 10 to 15 frothing sessions before I was consistently happy with the texture of my milk. Experienced baristas will adapt quickly; absolute beginners should expect a learning curve.
If you primarily want a machine for milk-based drinks and you’d rather skip the learning curve, check out our guide to the best espresso machines for lattes and cappuccinos — there are some fully-automatic alternatives worth considering.
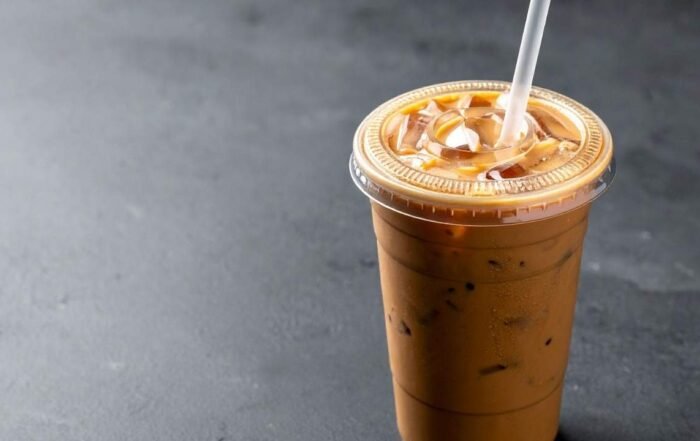
For making cold foam or iced latte drinks, the steam wand still works fine — you’ll just froth your chilled milk before adding espresso and ice.
Volumetric Brew Control
The Barista Brew lets you program your preferred shot volume into the single shot, double shot, and Americano buttons. Just press and hold the button while brewing, then release it when you’ve reached your target volume — the machine memorizes the dose from that point forward. This is called volumetric control, and it means your shots are repeatable every single morning without guesswork.
This single feature eliminated most of my morning “inconsistent espresso” frustrations within the first week of use.
Brewing Performance: What Does the Coffee Actually Taste Like?
Let’s cut to what actually matters.
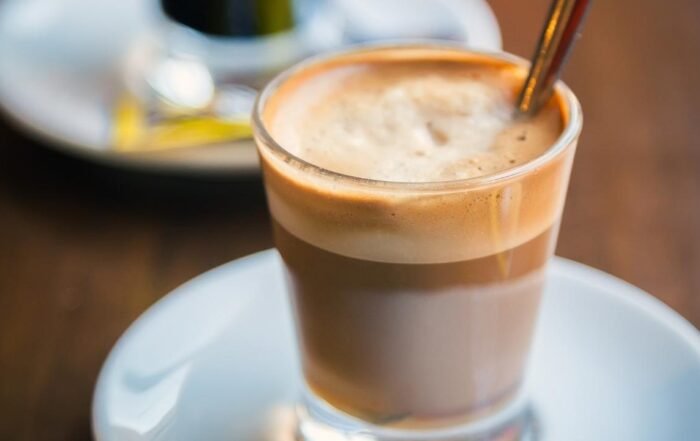
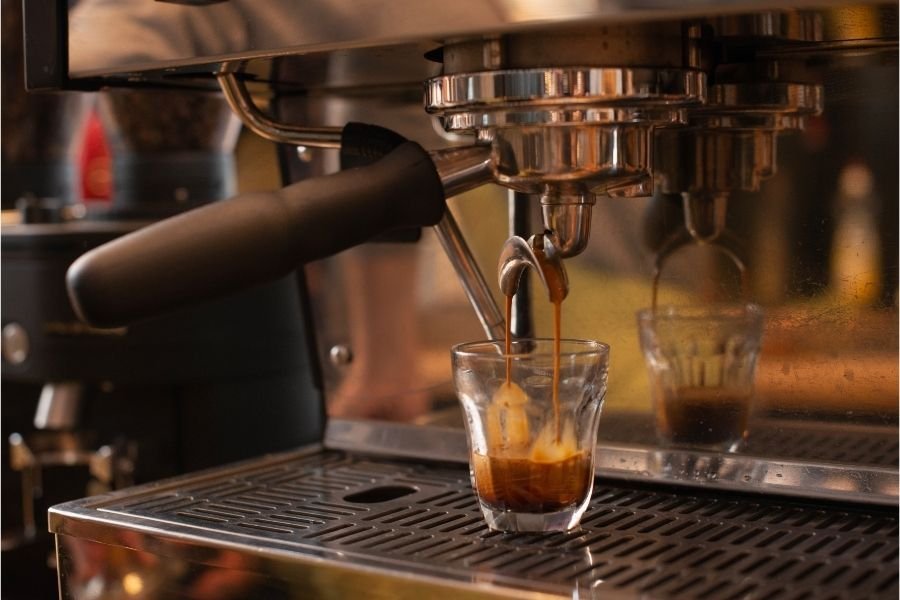
Once I dialed in the grind size (around setting 3–4 for espresso), reduced the default dose, and set the temperature to medium, the Barista Brew pulled genuinely excellent double shots — thick, golden-brown crema, balanced sweetness, and clear flavor distinction between different beans. I ran a Kenya AA light roast and a Colombian dark roast through it side by side; both produced shots I’d be happy to pay for at a café.
The pressure gauge on the front of the machine is one of the most practical features for beginners — it shows you in real time whether you’ve achieved optimal extraction pressure during a shot. Green zone = good. Simple, effective feedback.
The thermoblock heating system means the machine is ready to brew within about 60 seconds of switching it on — noticeably faster than machines with traditional boilers.
The one thing that takes practice: tamping pressure. The included spring-loaded calibrated tamper limits how hard you can press, which is great for consistency but can occasionally result in a puck that’s not dense enough for a tight extraction — especially when you’re using the non-pressurized baskets. Several reviewers have switched to a separate flat-bottomed tamper for better results. I ended up using a standard 58mm tamper I already owned, and extractions immediately improved.
Philips Barista Brew vs. Breville Barista Express: Head-to-Head
These two machines go head-to-head in almost every conversation about mid-range semi-automatic espresso. Here’s how they compare honestly:
| Feature | Philips Barista Brew | Breville Barista Express |
| Price | ~$479.99 | ~$699.99 |
| Portafilter Size | 58mm ✅ | 54mm |
| Grinder | Metal conical burr | Conical burr |
| Grind Settings | 15 | 16 |
| Pre-Infusion | Yes ✅ | No |
| Water Tank | 2.3L ✅ | 2.0L |
| Pump Pressure | 15 bar | 15 bar |
| Milk Frothing | Steam wand | Steam wand (more powerful) |
| Temperature Control | PID ✅ | PID |
| Auto Descaling | Yes ✅ | No |
| Dosing Funnel Included | Yes ✅ | No |
| Warranty | 2 years ✅ | 2 years |
| Noise Level | High (grinding) | Moderate |
My honest take: The Philips Barista Brew wins on value. You get a larger portafilter, automatic pre-infusion, more water capacity, and a lower price. The Breville edges ahead on grinder finesse — its steam wand is also slightly more powerful and easier to use. If budget is a real consideration (and $220 is a real difference), the Philips is the smarter buy. If milk-based drinks are your main focus and you want the most refined frothing experience, the Breville is worth the premium.
What’s In the Box?
Philips loads the Barista Brew with a genuinely impressive accessory package:
- 58mm stainless steel portafilter
- 4 filter baskets (single-wall and dual-wall, single and double shot)
- 450ml stainless steel milk jug with temperature indicator
- Calibrated spring-loaded tamper
- Dosing funnel (powder ring)
- Small espresso cup stand
- Cleaning pin and brushes
- Instruction booklet with step-by-step diagrams
- QR code for access to online barista training with coffee professional Heidi Philip-Smith
That barista training access is a genuinely useful addition — especially for first-time semi-automatic users. Most machines at this price point ship you a manual and wish you luck.
Can You Use Ground Coffee in the Philips Barista Brew?
Yes — and this is a question that comes up often. The machine works with both whole beans (ground fresh by the built-in grinder) and pre-ground coffee. To use pre-ground, you bypass the bean hopper and manually dose ground coffee directly into the portafilter before tamping.
The quality difference between pre-ground and freshly-ground beans is significant, though. Research consistently shows that ground coffee starts losing aromatic compounds within minutes of grinding. If you want to get the most out of this machine, use whole beans and grind fresh every time.
How to Make Perfect Espresso on the Philips Barista Brew: Step-by-Step
These are the steps I follow after weeks of trial, error, and a lot of over-extracted shots:
- Fill the bean hopper with fresh, high-quality espresso beans. Store the bag in an airtight container, away from heat and light.
- Set grind size to 3 or 4 as a starting point for espresso. Adjust finer if your shot runs too fast (under 20 seconds); adjust coarser if it runs too slow (over 35 seconds).
- Press the grinder button with the portafilter locked in the cradle. Use the dosing funnel to keep grounds contained.
- Tamp with firm, even pressure — straight down, not angled. If using the included calibrated tamper, press until you feel it click. If you have a conventional tamper, aim for around 30 lbs of pressure.
- Flush the group head with a few seconds of hot water before locking in your portafilter. This pre-heats the basket and stabilizes temperature.
- Lock in the portafilter and press your single or double shot button.
- Watch the pressure gauge — the needle should sit in the optimal zone during extraction. If it’s too low, grind finer or tamp harder. Too high, grind coarser.
- A good double shot should take 25–35 seconds and yield about 60ml (2 oz) of espresso with a golden crema on top.
- For milk drinks: steam your milk while the shot pulls. Submerge the steam wand just below the surface of the milk, angled slightly off-center to create a vortex. Stop when the temperature strip on the jug shows the target temperature.
Drinks You Can Make
The Barista Brew has dedicated buttons for:
- Single espresso
- Double espresso
- Americano (espresso + hot water, dispensed automatically)
With the steam wand, you can also make:
- Cappuccino — equal parts espresso, steamed milk, and milk foam
- Latte — espresso with more steamed milk and light foam
- Flat white — double ristretto with velvety microfoam
- Macchiato — espresso with a small amount of foamed milk
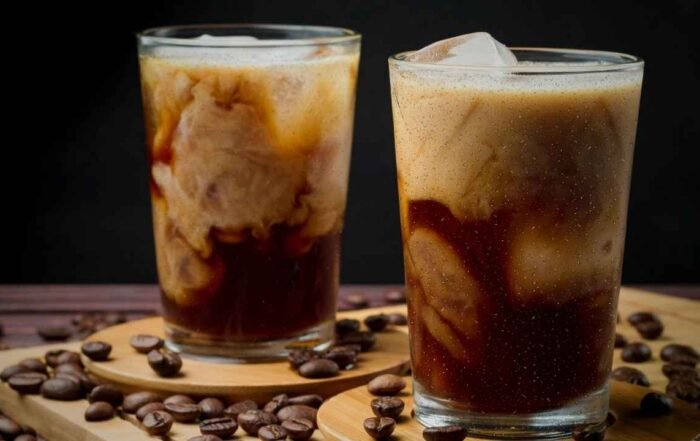
- Iced latte / iced cappuccino — froth cold milk, pour over ice, add espresso
- Hot water for Americano or tea — dispensed via the steam wand control
For dairy-free options: oat milk is by far the best choice for steaming on this machine. When I tested oat milk, whole milk, almond milk, and soy milk side by side, oat milk produced the silkiest microfoam and didn’t break or separate. Barista-edition oat milk (like Oatly Barista or Minor Figures) works especially well. Almond milk was the most difficult — it tends to foam unevenly and doesn’t hold well in a latte.
Cleaning and Maintenance
This is where the Barista Brew is genuinely well-designed.
- Drip tray: Removable and dishwasher safe. It has a red indicator float that pops up when the tray is full — a small touch that saves a lot of soggy counter incidents.
- Portafilter and baskets: Rinse with water after each use; dishwasher safe.
- Steam wand: Wipe immediately after every use while it’s still warm. Purge a small burst of steam before and after frothing to keep the inside clear.
- Automatic descaling: The machine prompts you when it’s time for a descaling cycle. Run it every 2–3 months depending on your water hardness. Hard water accelerates scale buildup, which degrades pressure and temperature stability over time.
- Bean hopper: If you’re switching between coffee types or storing the machine for a while, empty the hopper and run a few grinding cycles to clear out stale grounds.
According to a study published on water quality and espresso machine maintenance by the Specialty Coffee Association, water hardness is one of the leading causes of espresso machine degradation — using filtered water significantly extends machine life and protects flavor quality.
Philips Barista Brew Price: Is It Worth It?
The Barista Brew retails between $479.99 and $649.99 depending on where and when you buy. It frequently goes on sale — Amazon Prime Day, Black Friday, and Philips’ own site often bring it closer to $430–$450.
Let’s talk about what that price actually means in terms of daily coffee costs.
A standard latte at a specialty café runs $5.50–$7.00 in most US cities. If you buy one every weekday, that’s roughly $1,400–$1,800 per year. With the Barista Brew, a quality bag of whole beans (around $16–$22 for 12oz) makes approximately 20–25 double shots. Your cost per latte at home — including milk — works out to roughly $0.80–$1.20 per drink. At that rate, this machine pays for itself within four to six months of daily use.
For a broader look at how home espresso compares to café spending, Serious Eats’ guide to home espresso economics covers the math in depth.
Who Should Buy the Philips Barista Brew?
Buy it if:
– You’re a beginner or intermediate home barista who wants real espresso quality without a fully manual setup
– You want fresh-ground espresso without buying a separate grinder
– Your budget is under $500 and you want the most features for the money
– You make espresso-based milk drinks (lattes, cappuccinos, flat whites) daily
– You appreciate guided features but still want to develop real barista skills
Skip it if:
– You’re an advanced home barista who wants 30+ grind settings and full manual dosing control — look at the Breville Barista Pro or Sage Oracle
– You make almost exclusively milk-based drinks and want fully automatic steaming — consider a super-automatic machine like the Philips 3200 or 5400 series
– You need a machine for a very small counter space — at 16 inches long, it does require meaningful counter real estate
Pros and Cons
Pros:
– Professional-grade 58mm portafilter at a mid-range price
– Automatic pre-infusion improves extraction consistency
– PID temperature control for precise, repeatable results
– Built-in conical burr grinder — no separate grinder needed
– Excellent accessory package including dosing funnel and temperature-sensing milk jug
– Free barista training included
– Anti-fingerprint stainless steel finish
– Large 2.3L water tank
– Automatic descaling function
– 2-year warranty
Cons:
– Only 15 grind settings — serious espresso enthusiasts may want more precision
– Default dose setting grinds too much — requires immediate adjustment out of the box
– Steam wand requires practice and patience to master
– Grinder noise is on the louder side (~78 dB)
– Spring-loaded tamper can limit tamping pressure — a conventional tamper produces better results
– Narrow water tank is tricky to clean thoroughly
– Low cup clearance (95mm) — doesn’t accommodate tall mugs
Frequently Asked Questions
When was the Philips Barista Brew released?
Philips launched the Barista Brew (model PSA3218/01) in the US in July 2024. It was the brand’s first semi-automatic espresso machine — an entry into the market that had previously been dominated by competitors like Breville and De’Longhi.
Is the Philips Barista Brew good for beginners?
Yes — it’s one of the better beginner-oriented semi-automatic machines on the market. The calibrated tamper, pre-programmed shot buttons, pressure gauge, temperature-sensing milk jug, and included barista training all reduce the typical learning curve significantly. That said, steaming milk well will still take a couple of weeks of practice.
Can you use pre-ground coffee in the Philips Barista Brew?
Yes, you can bypass the hopper and use pre-ground coffee directly in the portafilter. For best results, always use freshly ground beans.
Does the Philips Barista Brew make good crema?
Yes — when the grind, dose, and tamp are dialed in correctly, the Barista Brew produces a thick, golden-brown crema comparable to specialty café shots. The 58mm portafilter and pre-infusion are the key contributors here.
How do you descale the Philips Barista Brew?
The machine prompts you when descaling is needed. Use a Philips-approved descaling solution (or any espresso machine descaler), fill the water tank, and run the automated descaling cycle per the instructions. The process takes about 30 minutes.
How do you clean the Philips Barista Brew daily?
Rinse the portafilter and baskets with water after each use. Wipe down the steam wand immediately after frothing. Empty and rinse the drip tray. Wipe the exterior with a damp cloth. Weekly, remove the drip tray and give it a proper wash.
What is the difference between the Philips Barista Brew and the Philips L’Or Barista?
The Philips L’Or Barista is a capsule machine designed specifically for L’Or and Nespresso pods. The Barista Brew uses whole beans or pre-ground coffee and gives you full control over the espresso process. They target very different users — the L’Or is for convenience, the Barista Brew is for craft.
Is the Philips Barista Brew worth it in 2025⁄2026?
At its current discounted price of around $479, yes — it offers more features per dollar than most competitors in the semi-automatic category. The 58mm portafilter, PID control, pre-infusion, and included accessory bundle make it a standout value. Just go in knowing the steam wand and grinder have minor limitations.
Final Verdict
The Philips Barista Brew semi-automatic espresso machine is exactly what it promises to be: a well-built, beginner-accessible espresso machine that produces genuinely café-quality shots — if you take the time to dial it in. It’s not the machine for hardcore espresso geeks who want micro-level grind control, and the steam wand will frustrate you for the first few weeks. But for anyone who wants to make exceptional espresso and milk-based drinks at home, learn real barista skills, and stop spending $6 every morning at the café, this machine delivers.
My personal recommendation: buy it, use the pressurized baskets for the first two weeks while you get your tamping technique consistent, then switch to single-wall baskets and prepare to be genuinely impressed by what you can pull at home.
For more help choosing between espresso machines or learning to brew better coffee at home, explore our full guides at The Coffee Treasures.
Have you tried the Philips Barista Brew? Drop your experience in the comments — I’d love to hear how you’ve dialed it in.