In this Article
- What Is a Moka Pot? (And Why It Matters for Your Brew)
- The Moka Pot Brewing Science (In Plain English)
- How to Brew Perfect Moka Pot Coffee — Step-by-Step
- Moka Pot Coffee Recipe: The Right Ratio
- Moka Pot Caffeine Content: The Real Numbers
- Moka Pot Calories and Nutrition
- Choosing the Best Moka Pot: Aluminum vs. Stainless Steel
- The Best Moka Pots in 2026: Tested and Compared
- Best Electric Moka Pots in 2026
- Moka Pot vs. Espresso Machine: The Honest Truth
- How to Use an Electric Moka Pot: Step-by-Step
- Moka Pot Variations: Iced, Vegan, and Specialty Drinks
- Common Moka Pot Mistakes and How to Fix Them
- How to Clean Your Moka Pot Properly
- Cost Comparison: Moka Pot Coffee at Home vs. Café
- Best Coffee Beans for Moka Pot Brewing
- Troubleshooting Guide: Quick Reference
- FAQ: Every Moka Pot Question Answered
- Final Thoughts
The moka pot produces some of the boldest, most satisfying coffee you can make at home — strong, rich, and deeply aromatic — in under five minutes. But most people are making at least two or three fixable mistakes that are quietly ruining every cup.
This complete guide fixes all of them. Whether you’re picking up a moka pot for the first time or you’ve been drinking bitter, metallic brews for years without knowing why, you’ll find every answer here: the correct grind, water temperature, heat management, and the exact moment to pull your pot off the stove. Plus a detailed breakdown of the best electric moka pots in 2026 and an honest comparison with traditional stovetop models.
What Is a Moka Pot? (And Why It Matters for Your Brew)
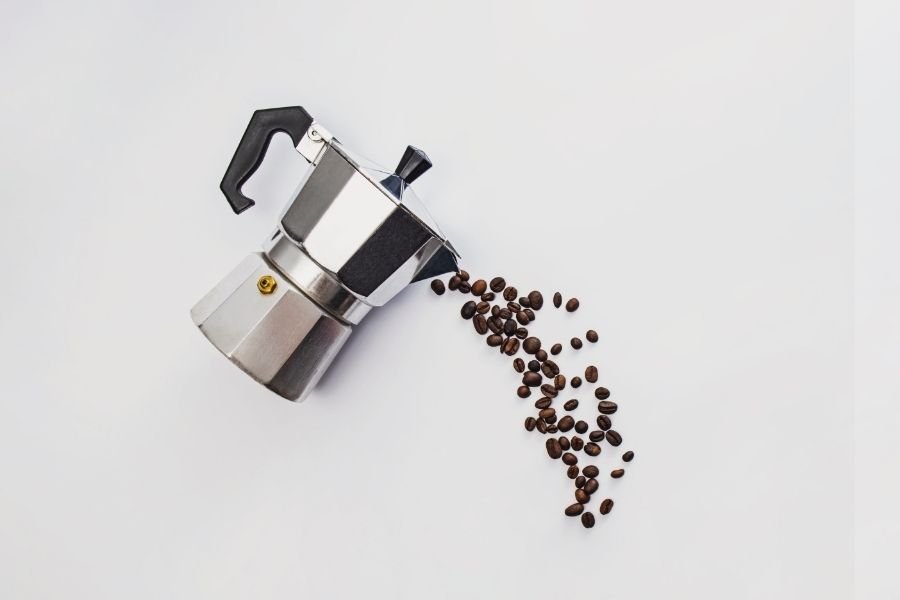
A moka pot is a stovetop (or electric) brewer that uses steam pressure to push hot water upward through a bed of coffee grounds, producing a concentrated, espresso-style coffee. It operates at 1–2 bars of pressure — far lower than an espresso machine’s 9 bars — but the result is still thick, intense, and deeply flavored in a way that drip coffee simply never achieves.
The design was patented in 1933 by Alfonso Bialetti, who based it on a design originally conceived by Luigi De Ponti. That iconic octagonal aluminum body, the little moustachioed man on the side, the hissing sound near the end of the brew — virtually nothing has changed in over 90 years. There’s a reason for that. The thing works.
It is not an espresso machine. Proper espresso demands 9+ bars of pressure; a moka pot tops out around 2 bars. But for making strong coffee at home without spending $500+ on a machine, nothing comes close to this $20–$60 device. You can use moka pot coffee as a base for lattes, cappuccinos, americanos, or cortados — and most people genuinely wouldn’t notice the difference.
The Moka Pot Brewing Science (In Plain English)
Understanding what’s physically happening inside your moka pot changes how you brew it — and fixes the bitter taste problem almost immediately.
Three chambers do all the work:
- Bottom chamber (boiler): Holds your water. As it heats, vapor pressure builds.
- Filter basket (funnel): Sits above the boiler and holds your ground coffee.
- Upper chamber (collector): Where your finished coffee collects.
As water heats, pressure pushes it up through the coffee grounds and into the upper chamber. The extraction happens fast — typically 3–5 minutes total. Here’s what the top-ranking guides don’t tell you clearly enough: there are actually two extraction phases. The first phase delivers smooth, rich coffee. The second “Strombolian” phase — where steam starts gurgling through the grounds — extracts harsh, bitter compounds. Your job is to stop the brew before phase two really gets going.
That’s why heat control is the single most important skill in moka pot brewing.
How to Brew Perfect Moka Pot Coffee — Step-by-Step
Here is the complete moka pot coffee recipe, with the details that actually matter.
What You’ll Need
- Moka pot (any size — see sizing guide below)
- Freshly ground coffee: 20–22g for a 4-cup pot; 36–40g for an 8-cup pot
- Hot water: Pre-boiled or near-boiling (around 90–96°C / 195–205°F)
- Digital scale (highly recommended — the single biggest upgrade for consistency)
- Burr grinder — a blade grinder will produce uneven particles and inconsistent extraction
Step 1: Preheat Your Water — Don’t Skip This
Fill a kettle or pot and bring water close to boiling. Pour the hot water into the bottom chamber, stopping just below the safety valve — never above it.
Why hot water? Starting with cold water means your coffee grounds sit on top of slowly heating water for 2–3 extra minutes. That prolonged exposure to moderate heat “pre-cooks” or “bakes” the grounds before real extraction even begins, and it’s one of the primary causes of bitter, metallic-tasting moka pot coffee. Hot water into the boiler = faster extraction, less bitterness. It’s the single most impactful change many brewers make.
Exact water amount by pot size:
| Pot Size | Water Volume | Coffee Dose |
| 1-cup | ~60 ml | ~7–8g |
| 3-cup | ~150 ml | ~15–17g |
| 4-cup | ~200 ml | ~20–22g |
| 6-cup | ~345 ml | ~28–32g |
| 8-cup | ~400 ml | ~36–40g |
Step 2: Grind Size — The Most Misunderstood Variable
Use a medium-fine grind — finer than drip coffee, coarser than true espresso. Imagine the texture of granulated table salt. Not powdery fine, not coarse like French press.
- Too fine: Over-extraction, bitter taste, potential filter clogging, dangerous pressure buildup
- Too coarse: Under-extraction, watery, sour or weak flavor
- Just right: Even, balanced, slightly sweet with a full body
On a Baratza Encore, that’s around setting 6–8. On a Niche Zero, approximately setting 25. If you’re using a hand grinder like the Timemore C2 or 1Zpresso JX, aim for 3–4 clicks from zero.
Fresh-roasted beans matter significantly more than most guides admit. Coffee roasted within the last 2–4 weeks extracts evenly and tastes noticeably cleaner than stale beans. Dark roasts work beautifully in a moka pot — an Italian-style or French roast produces that classic robust profile. Medium roasts bring out more nuance. Light roasts can turn acidic and thin due to the high extraction temperature. For your first few brews, stick with a medium-dark or dark roast while you calibrate your technique.
Insider tip: Don’t tamp your grounds. Ever. Tamping creates resistance that can cause uneven extraction or push the safety valve open. Fill the basket, give it a gentle shake to level the bed, wipe the rim clean, and that’s it.
Step 3: Assemble the Moka Pot Correctly
Place the filled filter basket into the bottom chamber. Check that no grounds are sitting on the rim — grounds on the sealing rim cause leaks and mess. Screw the upper chamber on firmly by hand. You don’t need to crank it, just make sure it’s snug.
Hold the hot bottom chamber with a folded towel or oven mitt. The metal gets hot fast.
Step 4: Place on Low-to-Medium Heat
Set your burner to low or medium-low heat. This is the step most people get wrong. High heat rushes the extraction, forces steam through the grounds before the water does, and produces a harsh, scorched flavor.
- Gas stove: Keep the flame just smaller than the base of the pot. Make absolutely sure the handle is not over the flame.
- Electric coil stove: Set to 4 out of 10.
- Induction hob: 40–50% power. You’ll need a stainless steel or induction-compatible moka pot — aluminum won’t work on induction.
- Glass/ceramic hob: Medium-low works well. Monitor the heat closely as these surfaces retain heat longer.
Leave the lid open so you can watch the coffee as it begins to rise.
Step 5: Watch for the Color Change — Pull It at the Right Moment
This is the part most guides under-explain, and it’s critical.
Coffee begins to flow up through the central spout as a rich, dark brown stream. That’s your extraction. Beautiful. Watch it.
When that stream starts to lighten in color — turning golden, blond, or honey-yellow — remove the pot from the heat immediately. That pale coffee is mostly water and steam, not flavor. It dilutes your brew and introduces bitter, harsh compounds.
Do not wait for the full gurgling, hissing sound that most guides describe as the “done” signal. By the time that sputtering starts, you’ve already over-extracted.
Once off the heat, run the bottom of the pot under cold water for 10–15 seconds to stop thermal inertia and halt extraction. Let the remaining coffee flow naturally into the upper chamber from residual pressure.
Step 6: Pour and Serve
Stir the coffee in the upper chamber gently before pouring — the first coffee out is more concentrated than what comes last, and stirring blends them for a more uniform cup.
Pour slowly into pre-warmed cups to minimize sediment. Drink it immediately. Moka pot coffee does not improve with sitting.
Moka Pot Coffee Recipe: The Right Ratio
The classic Italian recipe calls for 1:7 coffee-to-water ratio by weight — significantly stronger than drip coffee’s typical 1:16 ratio. In practice, a 4-cup moka pot with 20g of coffee and 200ml of water produces approximately 140–180ml of finished coffee (some water stays behind as steam).
If you want a longer, milder drink, simply add hot water to your finished moka pot brew — this is essentially a moka pot americano and tastes far better than diluting with cold water.
Moka Pot Caffeine Content: The Real Numbers
How much caffeine is in moka pot coffee? More than you might expect.
A 2 fl oz serving of moka pot coffee contains approximately 93 mg of caffeine. A full 6-cup moka pot produces around 130–160 mg of caffeine total, divided into smaller serving sizes.
Caffeine comparison by brewing method:
| Brewing Method | Caffeine per 2 oz |
| Moka pot | ~93 mg |
| Espresso (single shot) | ~63–75 mg |
| Drip coffee | ~22–30 mg |
| French press | ~25–35 mg |
Counterintuitively, moka pot coffee can contain more caffeine per ounce than espresso depending on brew parameters. A study published in Applied Sciences (MDPI) found that caffeine concentration in moka pot coffee ranged from 128 to 539 mg per 100 mL depending on brewing time, grind size, and temperature — a staggering range that underscores just how much technique matters. Lighter roasts retain slightly more caffeine than darker roasts, and finer grinds extract more caffeine per gram of coffee used.
The FDA recommends a maximum of 400 mg of caffeine per day for healthy adults. A 4-cup moka pot brew keeps you comfortably within those limits.
Moka Pot Calories and Nutrition
Black moka pot coffee contains approximately 2 calories per 6 oz serving — essentially nothing. No fat, no carbohydrates, no sugar. The calorie count only changes when you add milk, cream, sugar, or flavored syrups.
| Preparation | Approximate Calories |
| Black moka pot coffee (6 oz) | ~2 kcal |
| With whole milk (2 oz) | ~35–40 kcal |
| With oat milk (2 oz) | ~25–30 kcal |
| With sugar (1 tsp) | +16 kcal |
| Moka pot latte (4 oz whole milk) | ~70–80 kcal |
Coffee consumed without additives is also rich in antioxidants. Research published in Harvard Health notes that moderate coffee consumption is associated with reduced risk of several chronic diseases. Because moka pot brewing uses no paper filter, more coffee oils (including beneficial diterpenes) remain in the final cup compared to drip coffee.
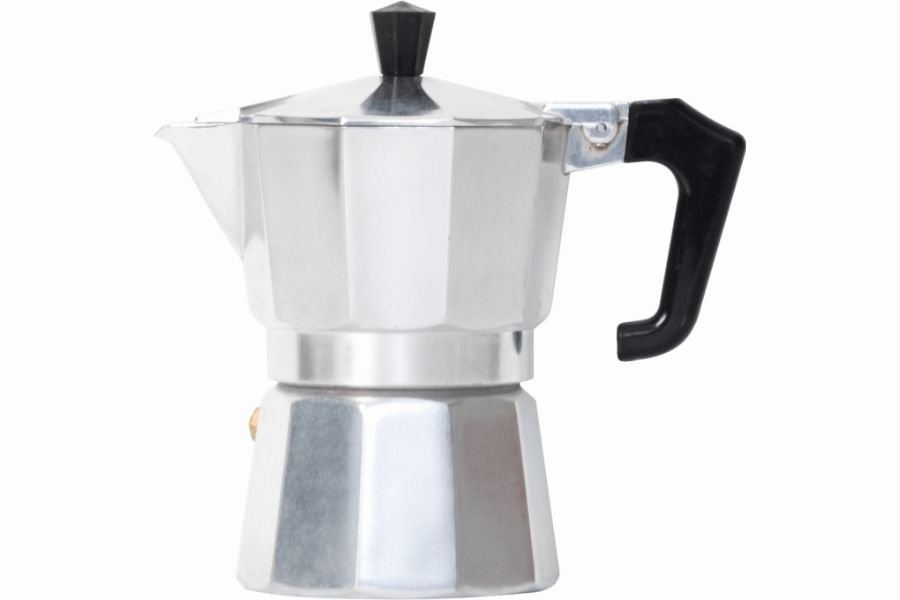
Choosing the Best Moka Pot: Aluminum vs. Stainless Steel
This debate comes up constantly, and there is no universally correct answer — but there are honest trade-offs.
Aluminum Moka Pots
Pros: Lighter, cheaper ($18–$35), heats faster, the classic choice for Italian-style coffee, iconic design. The original Bialetti Moka Express is aluminum.
Cons: Not induction-compatible, slightly harder to clean, reacts marginally to acidic compounds over time (though this is largely negligible once seasoned), can’t go in the dishwasher.
Stainless Steel Moka Pots
Pros: Induction compatible, easier to clean, more durable long-term, dishwasher-safe (in most cases), looks sleek in modern kitchens.
Cons: More expensive ($40–$90+), slower to heat, can be less forgiving on heat management, doesn’t build the same seasoning layer that aluminum develops over hundreds of brews.
Personal take: If you have a gas or electric coil stove, the aluminum Bialetti Moka Express produces a slightly richer, more complex cup in side-by-side testing. If you have induction, get the Bialetti Venus or Grosche Milano in stainless steel. Simple as that.
The Best Moka Pots in 2026: Tested and Compared
Best Overall Stovetop: Bialetti Moka Express
The original. Still the best for most people. The 3-cup ($29) and 6-cup ($45) versions deliver that classic, full-bodied Italian espresso-style brew that no other pot quite replicates. After thousands of batches, the aluminum body develops a seasoned patina that genuinely improves flavor.
Specs: Aluminum body | 6-cup holds ~345ml water | Not induction-compatible | ~$29–$45
One thing to know: The Bialetti produces more complex, layered flavor than most competitors in side-by-side tests. The trade-off is that it requires slightly more careful heat management than stainless steel models.
Best for Induction: Bialetti Venus
Stainless steel construction, induction-compatible, elegant tapered design. Brews consistently well on all heat sources. One downside: the stainless interior doesn’t season the way aluminum does, so it takes slightly longer to feel truly dialed in.
Specs: Stainless steel | Induction compatible | ~$55–$65
Best Budget Pick: Grosche Milano
Slightly cheaper than the Bialetti, aluminum body with a silicone gasket that lasts longer than the rubber gaskets on cheaper pots. Produces a smooth, full-bodied cup — heavier and more robust than the Bialetti in most testers’ assessments. The handle stays cool even on high heat, which is a real safety advantage.
Specs: Aluminum | Silicone gasket | ~$25–$35 | Not induction-compatible
Premium Design Pick: Alessi 9090
Designed by Richard Sapper, the Alessi 9090 is as much a design object as a coffee brewer. Stainless steel, induction-compatible, and produces remarkably balanced, nuanced coffee. But at $150+, it’s for someone who cares as much about the kitchen aesthetic as the cup quality.
Best Brikka (Crema Maker): Bialetti Brikka
If you want something closer to real espresso — including a crema-like layer on top — the Brikka uses a pressurized valve system to increase pressure beyond a standard moka pot. The result is richer, thicker, and more espresso-adjacent. It takes more practice to get right (very sensitive to grind size and dose), but the payoff is real.
Specs: Aluminum | Special pressure valve | ~$55–$70 | Available in 2-cup and 4-cup
Best Electric Moka Pots in 2026
Electric moka pots integrate a heating element directly into the base, eliminating the need for a stove. They’re particularly useful for offices, dorm rooms, travel, and anyone who doesn’t have reliable stove access.
The honest caveat: most electric moka pots produce slightly less nuanced coffee than a well-made stovetop brew because you have less real-time control over temperature and extraction speed. But the better electric models close that gap significantly.
Top Electric Moka Pot Picks
- IMUSA 6-Cup Electric Espresso Maker The most widely tested and reviewed electric moka pot with over 2,700 reviews and a 4.7-star average. Produces authentic Cuban-style coffee, easy to use, portable at 2.75 lbs, and consistently reliable. The main limitation: the reservoir is small for heavy drinkers and plug compatibility should be checked for non-US users.
Specs: 6-cup | ~$35–$45 | Portable | Best for: Home, office, travel
- De’Longhi EMK6 Alicia Electric Moka Pot De’Longhi’s well-regarded electric moka pot with a detachable base (similar to an electric kettle design). Keeps coffee warm after brewing, has a transparent top for easy monitoring. On the bulkier side, but coffee quality is noticeably above budget options.
Specs: 6-cup | ~$60–$75 | Keep-warm function
- Cloer Electric Moka Pot The slimmest, most compact electric option — ideal for small kitchens or travel. Stainless steel body, simple controls, and consistent results. For anyone who hates the bulky “pot on a base” design of many electric models, this is the one.
Specs: Stainless steel | Compact design | ~$55–$70
- Ariete Electric Moka Pot Italian-made and available in several sizes. Retains the traditional moka pot silhouette with an integrated heating element. Produces good coffee, though the plastic components around the base feel slightly cheap at this price point.
Specs: 4-cup and 6-cup options | ~$45–$60 | Made in Italy
Stovetop vs. Electric Moka Pot: Which Should You Buy?
| Factor | Stovetop | Electric |
| Coffee quality | Slightly better | Good to very good |
| Heat control | Manual (full control) | Automated (less control) |
| Price | $18–$90 | $35–$80 |
| Portability (travel) | Yes (with gas stove/camping) | Yes (with outlet) |
| Convenience | Requires stove | Plug-and-brew |
| Durability | Decades with care | 3–7 years typically |
| Induction compatibility | Depends on material | N/A (self-heated) |
| Learning curve | Moderate | Low |
Bottom line: If you have a stove and care about dialing in the best possible cup, go stovetop. If you want a foolproof morning routine or need something for the office, electric is perfectly practical.
Moka Pot vs. Espresso Machine: The Honest Truth
This comparison gets oversimplified online, so let’s be specific.
Moka pot:
- 1–2 bars of pressure
- Produces ~140–180ml of concentrated coffee
- No crema (or minimal crema with a Brikka)
- Cost: $20–$90
- Maintenance: Rinse with water, done
Espresso machine:
- 9 bars of pressure
- Produces 25–30ml of true espresso per shot
- Rich crema layer
- Cost: $200 (entry-level) to $3,000+
- Maintenance: Regular descaling, portafilter cleaning, group head maintenance
For most home brewers, the moka pot is a remarkable value play. You get most of the espresso experience for a fraction of the cost and complexity. The gap is noticeable to a trained palate — espresso has more body, more crema, more concentrated sweetness — but for a morning coffee, a moka pot latte, or a quick after-dinner brew, the moka pot more than holds its own.
How to Use an Electric Moka Pot: Step-by-Step
Electric moka pots follow the same basic principles as stovetop versions, but with a few important differences.
- Fill the lower chamber with hot water to just below the safety valve.
- Grind and load the filter basket with medium-fine ground coffee. Same rules apply: don’t tamp, level gently, wipe the rim.
- Assemble the pot and ensure all seals are snug.
- Plug in and switch on. Most electric models have a single on/off switch.
- Monitor the brew. Don’t walk away. Watch through the lid or listen for the transition from slow drips to a lighter stream.
- Switch off immediately when the coffee stream lightens or begins to sputter — don’t wait for the full gurgling phase.
- Stir and pour. Same as stovetop: stir the upper chamber, pour immediately.
The biggest mistake people make with electric moka pots is treating them as set-and-forget appliances. They still require you to watch the brew and cut power at the right moment.
Moka Pot Variations: Iced, Vegan, and Specialty Drinks
Iced Moka Pot Coffee
Brew double-strength: use 25–28g of coffee for a 4-cup pot. Pour the hot brew directly over a full glass of ice. The ice dilutes the coffee back to normal strength while chilling it instantly. Do not let the coffee cool to room temperature before pouring — it will taste flat and stale.
For a proper iced moka pot latte: brew, pour over ice, then add cold oat milk or whole milk and a pinch of fine salt to balance any bitterness.
Vegan/Dairy-Free Moka Pot Latte
Oat milk is the closest plant-based option to whole milk in a moka pot latte. It froths reasonably well, has a neutral sweetness that complements dark roast coffee, and doesn’t split the way thin almond milk sometimes does. Barista-blend oat milk (Oatly Barista, Minor Figures) specifically is worth the extra dollar.
For frothing plant-based milk at home, a handheld milk frother like the Zulay or Bonsenkitchen models (under $12) gets the job done in 30 seconds. You can also check out our guide to the best milk frothers for home use for a full comparison across price ranges.
Moka Pot Cappuccino
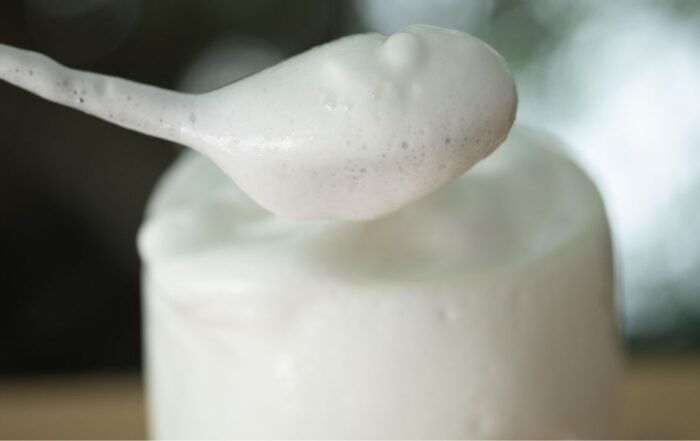
Brew a full 4-cup moka pot (roughly 150ml of finished coffee). Steam or froth 100–120ml of whole milk to 60–65°C. Pour the coffee first, then the milk with the foam on top. The moka pot brew lacks true espresso crema, but the result is a very satisfying, strong, frothy drink that most people will happily accept as a cappuccino.
Moka Pot Americano
One of the best uses for moka pot coffee that almost nobody talks about: brew a 4-cup pot, then add 200ml of hot water. The result is a long black or americano-style drink with the depth and intensity of espresso but the volume of a regular coffee. Excellent.
Common Moka Pot Mistakes and How to Fix Them
The single most important thing to know about moka pot troubleshooting: most problems trace back to one of three causes — wrong grind size, too much heat, or not pulling the pot off the heat in time. Fix those three things and 90% of problems disappear.
Problem: Coffee Tastes Bitter
This is the most common complaint and the easiest to fix.
- Cause 1: Heat too high — fix by using medium-low heat
- Cause 2: Letting the brew run too long into the gurgling phase — fix by removing from heat when the stream lightens
- Cause 3: Grind too fine — fix by going slightly coarser
- Cause 4: Starting with cold water — fix by using pre-boiled water in the boiler
- Cause 5: Old or stale coffee — fix by buying fresher beans
Problem: Coffee Tastes Weak or Sour
- Cause 1: Grind too coarse — water passes through too fast without extracting properly
- Cause 2: Too little coffee in the basket — fill it to the brim
- Cause 3: Heat too low — extraction stalls before completing
- Cause 4: Under-roasted beans (light roast) running at high temperature — switch to medium-dark
Problem: Coffee Has Too Much Sediment
The moka pot always produces some fine sediment — that’s normal and unavoidable without a paper filter. If it’s excessive, your grind is too fine or the filter plate gasket has worn out and is letting particles through. Replace the gasket annually if you brew daily.
To reduce sediment in the cup: pour slowly and stop before the last few drops (which carry the most fine particles). A small amount of sediment at the bottom of the cup is traditional and harmless.
Problem: Coffee Spurts or Leaks from the Seal
Either the seal gasket is worn or you haven’t screwed the chambers together tightly enough. Check the rubber or silicone gasket — it should be pliable and show no cracking. Replace it every 12–18 months for daily use. Replacement gaskets for most Bialetti models cost under $5 online.
Problem: No Coffee Coming Out / Very Slow Flow
Your grind is almost certainly too fine, creating too much resistance. This is particularly common when people borrow espresso-ground coffee from a café or buy pre-ground espresso. Switch to medium-fine and the problem resolves immediately.
How to Clean Your Moka Pot Properly
Most guides say “rinse with warm water.” That’s correct but incomplete.
After every brew:
- Allow the pot to cool completely before disassembling (burned fingers are real)
- Unscrew the upper and lower chambers
- Remove the filter basket and rubber/silicone gasket
- Rinse all parts with warm water — no soap. Soap removes the seasoning layer from aluminum and can leave soapy residue that affects flavor
- Dry completely before reassembling — trapped moisture causes rust in aluminum pots and mineral buildup in stainless
Monthly deep clean:
- Run a solution of 1 part white vinegar to 2 parts water through a full brew cycle to descale mineral deposits
- For stubborn coffee oil buildup, a dedicated coffee equipment cleaner like Urnex Cafiza works without harming the metal
Storage tip: Don’t screw the chambers together tightly when storing. Keeping constant pressure on the gasket accelerates wear. Store it loosely assembled or in parts.
Aluminum discoloration: Over time, the inside of an aluminum pot will darken. This is not dirt — it’s a natural oxidation patina that many experienced moka pot users believe actually improves flavor. Don’t scrub it off.
Cost Comparison: Moka Pot Coffee at Home vs. Café
Let’s put real numbers on this.
Moka pot setup cost:
- Bialetti Moka Express 4-cup: ~$35
- Quality burr grinder (Timemore C2 hand grinder): ~$40
- Good coffee beans: ~$15–$20 per 250g bag (approximately 12–15 brews)
Per-brew cost (home):
- Coffee beans: ~$1.20–$1.50 per brew
- Electricity/gas: negligible (~$0.02)
- Total: approximately $1.25–$1.55 per brew
Café espresso-based drink: $4.50–$6.50 per drink in most cities
Annual savings (1 brew per day vs. café):
- Café: ~$1,600–$2,400 per year
- Home moka pot: ~$450–$565 per year
- Potential savings: $1,000–$1,900 per year
The moka pot pays for itself in under a month of daily use.
Best Coffee Beans for Moka Pot Brewing
Not all beans perform equally in a moka pot. The high extraction temperature and pressure favor certain roast profiles.
Best roast level: Medium-dark to dark roast. The moka pot’s extraction method amplifies the bold, chocolatey, nutty qualities in darker roasts. Classic Italian roasts (like those from Lavazza or illy) were literally designed for this brewing method.
Specific recommendations:
- Lavazza Super Crema: A classic Italian blend with notes of hazelnuts and dried fruit. Rich, smooth, and forgiving. Excellent value at ~$14–$16 per 500g bag.
- illy Classico: Clean, balanced, medium roast. Slightly more nuanced than Lavazza, with better performance for those who like a less intense brew.
- Intelligentsia Black Cat Classic Espresso: For specialty coffee enthusiasts. A blend designed for espresso extraction that performs beautifully in a moka pot. More complex and fruit-forward than Italian blends.
- Stumptown Hair Bender: Bold, full-bodied, complex. If you want something that can carry milk without disappearing, this is a strong choice.
What to avoid: Very light roasts (too acidic at moka pot temperatures), pre-ground supermarket coffee (stale by the time you buy it), and anything advertised as “extra fine espresso grind” (too fine for a moka pot basket).
Troubleshooting Guide: Quick Reference
| Symptom | Likely Cause | Fix |
| Bitter coffee | Heat too high / over-extracted | Lower heat, pull off earlier |
| Weak / sour coffee | Grind too coarse / too little coffee | Finer grind, full basket |
| Metallic taste | Aluminum not seasoned / stale beans | Run 2–3 seasoning brews; use fresh beans |
| Spurting / leaking | Worn gasket / loose seal | Replace gasket; tighten chambers |
| No coffee flow | Grind too fine / clogged filter | Coarser grind; clean filter plate |
| Excessive sediment | Worn gasket / grind too fine | Replace gasket; adjust grind |
| Burning plastic smell | Handle over flame | Move handle away from heat source |
FAQ: Every Moka Pot Question Answered
How do you make coffee in an electric moka pot? Fill the lower chamber with hot water below the safety valve, load the filter basket with medium-fine ground coffee (don’t tamp), assemble firmly, plug in and switch on. Monitor the brew and cut power when the coffee stream turns golden or honey-colored — before the sputtering phase. Stir and pour immediately. The process takes 4–6 minutes total.
What is the best grind size for a moka pot? Medium-fine, similar to granulated table salt — finer than drip coffee but coarser than true espresso. On a Baratza Encore, use settings 6–8. On a Niche Zero, approximately setting 25. Too fine causes over-extraction and blockages; too coarse produces weak, sour coffee.
How much caffeine is in moka pot coffee? Approximately 93 mg per 2 oz serving, or 130–160 mg for a full 6-cup moka pot output. This makes moka pot coffee notably stronger per ounce than drip coffee and slightly stronger per serving than a single espresso shot, well within the FDA’s recommended 400 mg daily limit.
How many calories are in moka pot coffee? Plain black moka pot coffee contains approximately 2 calories per 6 oz serving. Adding 2 oz of whole milk adds around 35–40 calories. A full moka pot latte with 4 oz of whole milk is approximately 70–80 calories.
Should the moka pot be on high or low heat? Always medium-low to low heat. High heat forces steam through the grounds before proper liquid extraction, scorches the coffee, and produces harsh, bitter flavors. The best moka pot brews happen slowly on gentle heat. Patience here is directly rewarded in the cup.
What not to do with a moka pot? Don’t tamp the grounds, don’t fill the boiler above the safety valve, don’t use high heat, don’t start with cold water in the boiler, don’t let the brew run through the full gurgling/sputtering phase, don’t use soap on aluminum, and don’t store it with the chambers screwed tightly together (degrades the gasket faster).
Is moka pot coffee the same as espresso? No. Moka pots operate at 1–2 bars of pressure; true espresso requires 9 bars. Moka pot coffee is more concentrated than drip coffee but less concentrated than espresso. It lacks true crema and has a slightly different flavor profile — bolder and sometimes more bitter than espresso, with less body and sweetness. That said, it works well as an espresso substitute in lattes, cappuccinos, and americanos.
Can you make iced moka pot coffee? Yes. Brew at double strength (25–28g coffee for a 4-cup pot) and pour directly over a full glass of ice immediately after brewing. The ice melts and dilutes the coffee to the right concentration while chilling it. Don’t let it cool before pouring — it will taste flat.
How do you make a vegan or dairy-free moka pot latte? Brew normally, then froth barista-blend oat milk (Oatly Barista or Minor Figures are the best options) using a handheld frother. Pour the oat milk foam over your moka pot brew. Barista oat milk is specifically formulated to froth and not split when combined with hot coffee.
How often should you replace the moka pot gasket? Every 12–18 months for daily use, or when you notice coffee leaking from the seal or the rubber appears cracked or hardened. Replacement gaskets are widely available for under $5 and take about two minutes to swap.
Can I use a moka pot on an induction stove? Only stainless steel moka pots work on induction — aluminum lacks the magnetic properties induction requires. Good induction-compatible options include the Bialetti Venus, Grosche Milano Steel, and the Alessi 9090.
Why does my moka pot coffee taste metallic? Almost always a new aluminum pot that hasn’t been seasoned. Run 2–3 “sacrifice brews” — full cycles of water and cheap coffee that you discard — before using the coffee to drink. The metallic taste disappears as the aluminum develops its natural protective patina.
Can I make moka pot coffee ahead of time and store it? You can, but you shouldn’t. Moka pot coffee tastes significantly better fresh — the oils and volatile aromatics dissipate within 20–30 minutes. If you must store it, use an airtight glass container, refrigerate immediately, and consume within 24 hours. Reheat gently on the stove in a saucepan; microwave reheating tends to produce a flat, slightly harsh taste.
How do I compare moka pot coffee to a Starbucks espresso drink? A Starbucks double espresso-based drink (like a latte) uses approximately 18g of espresso-ground coffee at 9 bars of pressure. A moka pot latte uses similar amounts of coffee but at lower pressure, producing a slightly less concentrated base. The result is a bit bolder and more bitter than Starbucks espresso but works just as well as a base for milk drinks — and costs about $5 less per serving.
Final Thoughts
The moka pot is one of the most rewarding coffee tools you can own. It’s inexpensive, nearly indestructible, and produces a genuinely excellent cup when you understand the three non-negotiables: hot water in the boiler, medium-fine grind, and low-medium heat with an early pull from the stove.
If you’ve been making bitter, harsh moka pot coffee for years, try those three changes tomorrow morning. The difference will be immediate and obvious. It’s not about buying a better pot — it’s about technique.
For most people, the Bialetti Moka Express remains the best choice: proven over 90 years, excellent coffee, and an honest $35. If you need induction, get the Bialetti Venus. For electric convenience, the IMUSA 6-Cup is the most reliable and widely tested option available.
Start there. Dial in your grind and heat over a few brews. And enjoy one of the best-value coffee setups you’ll ever put on your kitchen counter.