
In this Article
- Why Cleaning Your Drip Coffee Maker Actually Matters
- How Often Should You Clean a Drip Coffee Maker?
- Signs Your Machine Is Overdue for Cleaning
- Method 1: How to Clean a Drip Coffee Maker with Vinegar
- Method 2: How to Clean a Drip Coffee Maker Without Vinegar
- Brand-Specific Cleaning Instructions (2026)
- Deep Cleaning the Carafe: Removing Stubborn Coffee Stains
- How to Handle Mold in a Drip Coffee Maker
- Cost Breakdown: What Cleaning Actually Costs
- What Goes in the Dishwasher? (Quick Reference)
- Maintaining Better Coffee Between Deep Cleans
- Troubleshooting: When Cleaning Doesn’t Fix the Problem
- Frequently Asked Questions
- Final Thoughts
A dirty drip coffee maker is quietly ruining your coffee — and a 30-minute cleaning will almost certainly fix it. Bitter taste, slow brewing, and that persistent stale smell aren’t bean problems. They’re machine problems. I know because I spent three months blaming my beans before I finally opened my Cuisinart reservoir and found a ring of chalky white crust coating the entire inside. One proper cleaning later, the same beans tasted completely different.
This guide covers everything: the full step-by-step vinegar method, four alternatives for vinegar-haters, brand-specific instructions for Cuisinart, Ninja, Mr. Coffee, and Hamilton Beach, a mold removal protocol, carafe stain solutions, a water hardness chart, cost comparisons, and a troubleshooting section for when cleaning still doesn’t fix the problem.
Why Cleaning Your Drip Coffee Maker Actually Matters
A dirty drip machine suffers from two separate problems: bacterial contamination and mineral scale buildup. Both destroy your coffee’s flavor. Both damage the machine over time. And they need slightly different approaches to fix properly.
The Bacteria Problem Is Real
According to James E. Rogers, PhD — Consumer Reports’ head of product safety testing — bacteria including E. coli, salmonella, and Listeria monocytogenes can grow in room-temperature coffee. Rogers, a microbiologist, specifically recommends cleaning the drip tray every single day.
The warm, perpetually moist environment inside a drip coffee maker is practically a laboratory for microbial growth. The reservoir lid, drip tray, brew basket, and internal tubing all create dark, humid spaces where bacteria and mold thrive quietly between brews.
The Scale Problem Nobody Explains Properly
Every time you brew, tap water minerals — primarily calcium and magnesium carbonate — deposit a thin film on every internal surface the water touches. One brew does nothing. Three months of daily brewing without cleaning produces a hard, chalky layer that:
- Narrows internal water tubes, restricting flow and slowing brew time
- Coats the heating element, forcing it to work harder
- Lowers water temperature reaching your grounds — causing weak, sour, under-extracted coffee
- Creates a metallic or chemical aftertaste as scale dissolves back into the brew
Consumer Reports warns that minerals from home water can clog a coffee maker’s tank and tubes severely enough to stop the machine working entirely, with excessive steaming and increased brew cycle times as the clearest warning signs of serious trouble.
The financial case: A decent drip machine costs $60–$150. Neglecting cleaning realistically shortens its life from 6–8 years to 2–3 years. Annual cleaning costs? About $2–$5 in white vinegar. The math is obvious.

How Often Should You Clean a Drip Coffee Maker?
Cleaning frequency depends on two things: how often you brew, and how hard your local water is. Most guides give a single answer. Here’s the full picture.
Daily Routine — 5 Minutes, Non-Negotiable
- Rinse the brew basket with warm water immediately after every use
- Wash the carafe with dish soap and warm water
- Empty and rinse the drip tray — this is the germiest spot in the entire machine and the most neglected
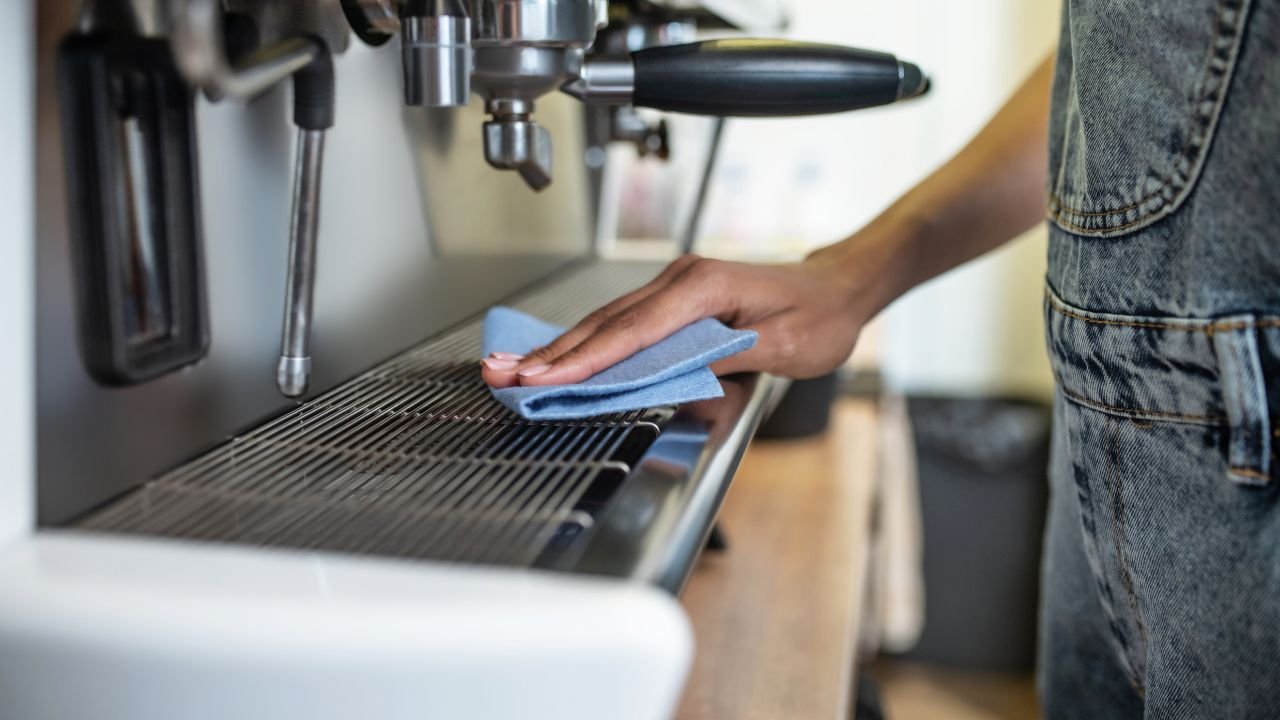
- Wipe the showerhead (the spray mechanism above the basket) with a damp cloth
- Leave the reservoir lid open overnight — air circulation prevents mold from establishing itself in the warm, enclosed environment
I skipped the drip tray step for almost a year. When I finally pulled it out and examined it properly, I understood immediately why my coffee had developed that persistent off-note. Don’t be past-me.
Weekly Cleaning — 10 Minutes
- Wash the brew basket, carafe lid, and filter holder with warm soapy water
- Check the showerhead spray holes for coffee residue blocking individual holes — a toothpick clears them in seconds
- Wipe the warming plate while slightly warm — baked-on drips get exponentially harder to remove the longer you leave them
Monthly Deep Clean and Descale
Full vinegar or descaling solution cycle through the entire machine. This is what most people searching “how to clean a drip coffee maker” actually need. Full instructions below.
Water Hardness: The Variable Every Guide Ignores
Your local water hardness is the single biggest factor determining how fast scale builds up inside your machine. Most articles completely ignore this.
| Water Hardness | Mineral Content | Descaling Frequency |
| Soft (0–60 ppm) | Minimal scale | Every 3–4 months |
| Moderately Hard (61–120 ppm) | Moderate buildup | Every 1–2 months |
| Hard (121–180 ppm) | Visible scale forms | Monthly |
| Very Hard (181+ ppm) | Aggressive rapid buildup | Every 2–3 weeks |
How to find your water hardness: Buy a TDS meter ($10) or water hardness test strips ($8) from Amazon. Alternatively, Google your city’s annual water quality report — most municipalities publish this publicly. Areas in Texas, Arizona, California, and Florida notoriously have hard water and may require more frequent descaling than the standard monthly recommendation.
If you live in Phoenix, Las Vegas, San Antonio, Dallas, or anywhere in the Southwest or Midwest — monthly descaling is not a suggestion. It’s basic maintenance.
Signs Your Machine Is Overdue for Cleaning
Your coffee maker communicates. Here’s what each symptom actually means:
Taste and Smell:
- ☕ Bitter or metallic flavor — scale buildup lowering brew temperature, causing under-extraction; or rancid oil residue in the brew basket
- ☕ Musty or damp smell during brewing — mold in the reservoir, basket area, or internal tubing
- ☕ Flat taste despite fresh beans — heating element impaired by scale, unable to reach proper extraction temperature (195–205°F)
- ☕ Chemical aftertaste — mineral deposits dissolving back into brew
Performance:
- 🔧 Noticeably slower brew cycle — scale-narrowed tubes restricting water flow
- 🔧 Coffee not as hot as it used to be — scale-coated heating element working below capacity
- 🔧 Machine sputtering or gurgling — partial internal blockage
- 🔧 Clean indicator light on — treat this as a hard deadline, not a soft suggestion
Visual:
- 👁 White chalky residue inside reservoir or carafe
- 👁 Brown oily film in the brew basket or filter holder
- 👁 Fuzzy growth in any color anywhere in the machine — this requires the mold protocol below, not just a regular cleaning

Method 1: How to Clean a Drip Coffee Maker with Vinegar
White distilled vinegar is the most accessible, lowest-cost, and genuinely effective cleaning solution for most drip machines. Its acetic acid dissolves calcium and magnesium scale, kills most bacteria, and cuts rancid coffee oil residue — all for about $0.20 per cleaning. The smell is real. The results are also real.
What You Need
- White distilled vinegar (5% acidity — not apple cider, not cleaning-strength)
- Fresh cold water
- Dish soap and a bottle brush
- Soft cloth or paper towels
- Optional: toothpick for clearing showerhead holes
Step-by-Step: Full Vinegar Deep Clean
Step 1: Unplug and disassemble. Turn off and unplug the machine. Remove the carafe, brew basket, carafe lid, and drip tray. Discard old grounds and any paper filter.
⚠️ Critical step most guides skip: If your machine has a charcoal water filter inside the reservoir — remove it now before adding any vinegar. Vinegar destroys charcoal filters and flushes carbon particles into the machine’s plumbing. This is non-negotiable for Cuisinart, Hamilton Beach, and many Braun machines.
Step 2: Hand wash all removable parts. Wash the carafe, brew basket, lid, and drip tray with warm soapy water. Use a bottle brush for the carafe interior — coffee oils accumulate in a ring at the bottom that regular rinsing never touches. For stubborn brown staining: fill with hot water plus 2 tablespoons of baking soda, soak 15 minutes, scrub, rinse.
Step 3: Mix and fill the reservoir. Combine equal parts white distilled vinegar and cold water — enough to fill the reservoir to maximum. For a standard 12-cup machine: 6 cups of vinegar, 6 cups of water. If you have heavy visible scale: increase to 60% vinegar / 40% water for the first cleaning. Return to 50/50 for regular maintenance after that.
Step 4: Place an empty paper filter and start brewing. Put a fresh paper filter in the basket — no coffee. Position the empty carafe on the warming plate. Start a normal brew cycle.
Step 5: Pause at the halfway point and soak. When roughly half the liquid has dripped into the carafe — pause or turn off the machine. Let it sit for 30–60 minutes. This is the step most guides include but don’t explain properly: the soak allows acetic acid to penetrate and dissolve scale deposits that a quick pass-through barely touches.
For a heavily scaled machine: soak the full 60 minutes. For regular monthly maintenance: 30 minutes is sufficient.
Step 6: Complete the cycle and discard. Restart the machine and let the remaining liquid brew through. Discard everything in the carafe.
Step 7: Run two full rinse cycles — minimum. Fill the reservoir with fresh cold water only. Run a complete brew cycle. Discard. Repeat with a second full reservoir. “Always run the brew cycle with water a couple of times to get rid of the vinegar taste before brewing coffee,” advises Consumer Reports’ cleaning guidance. Two cycles is the floor — for sensitive palates, run three.
Step 8: The sniff test (everyone skips this, don’t). Before brewing real coffee, smell the steam from a hot water cycle or sniff the carafe opening. Any detectable vinegar odor means run one more rinse cycle. Residual vinegar in your first post-cleaning cup is genuinely awful and wastes the whole effort.
Step 9: Dry completely, then reassemble. Dry all parts before reassembling. Wipe the warming plate, exterior, and showerhead with a damp cloth. If your machine uses a charcoal reservoir filter — reinstall it now, or replace it if it’s been more than 60 days.
Method 2: How to Clean a Drip Coffee Maker Without Vinegar
Vinegar’s smell during the long soak is genuinely unpleasant. Fair. Here are four effective alternatives, ranked honestly:
Option A: Citric Acid Powder — Best Non-Vinegar Method
Citric acid can kill bacteria, mold, and mildew while effectively removing hard water deposits. When tested against multiple cleaning methods, citric acid-based products consistently produced cleaner results with no lingering taste or odor.
It’s the active ingredient in most commercial descaling products, costs almost nothing in bulk, and requires only two rinse cycles versus three for vinegar.
- Mix: 1 tablespoon food-grade citric acid powder dissolved in 1 quart (4 cups) of warm water — stir until fully dissolved before adding to the reservoir
- Process: Identical to the vinegar method — fill, brew halfway, soak 30–45 minutes, complete, rinse twice
- Rinse cycles needed: 2
- Cost per clean: ~$0.25–$0.35
- Where to buy: Amazon, health food stores, bulk retailers (~$8–12 for a bag lasting a year)
This is my personal switch from vinegar. Same results, no smell, fewer rinse cycles. I keep a small jar next to the machine.
Option B: Commercial Descaling Products
Urnex Dezcal ($12), Affresh Coffee Maker Cleaner ($10), and Durgol (~$14) use food-safe citric or lactic acid. They work faster, require one rinse cycle, leave no odor, and are formulated specifically for coffee machine materials.
Best for: hard-water areas needing monthly cleaning, or machines that haven’t been cleaned in 6+ months and need a powerful first treatment.
Option C: Baking Soda — For Freshening Only
Baking soda removes odors and cuts coffee oil residue effectively. It does almost nothing for mineral scale. It’s an alkaline cleaner — scale requires acid to dissolve. Use it for light maintenance and odor removal, not as a descaling substitute.
- Mix: 1 tablespoon baking soda fully dissolved in 4 cups warm water (undissolved clumps can clog internal tubes)
- Process: Standard brew-and-discard, no pause required
- Rinse cycles needed: 2–3
Option D: Lemon Juice — Emergency Only
Lemon juice contains naturally occurring citric acid and will dissolve mild scale. Problems: more expensive than vinegar, slightly less effective, requires 3 rinse cycles. Use it only when nothing else is available.
- Mix: 50/50 fresh lemon juice and cold water
- Rinse cycles needed: 3 minimum
Cleaning Methods Compared
| Method | Scale Removal | Odor | Rinse Cycles | Cost per Use |
| White Vinegar | ★★★★☆ | Strong | 2–3 | ~$0.20 |
| Citric Acid | ★★★★★ | None | 2 | ~$0.30 |
| Commercial Descaler | ★★★★★ | None | 1 | ~$1.50–2.50 |
| Baking Soda | ★★☆☆☆ | Mild | 2 | ~$0.10 |
| Lemon Juice | ★★★☆☆ | Citrus | 3 | ~$0.80 |
Brand-Specific Cleaning Instructions (2026)
Every drip coffee maker brand has quirks that generic guides ignore entirely. Here’s what actually matters for the most common machines:
How to Clean a Cuisinart Drip Coffee Maker
Most Cuisinart coffee maker models include a self-cleaning function with a dedicated Clean button. Fill the carafe with 3 parts water and 1 part vinegar, empty the carafe into the reservoir, then press and hold “Clean.” The light will blink to indicate the cycle is working.
- Remove the charcoal filter first — absolutely required, no exceptions
- Fill reservoir with your cleaning solution (50/50 vinegar-water, or citric acid solution)
- Press and hold the Clean button until the light glows solid
- Let the extended cycle run completely without interruption — 60–90 minutes
- When the light turns off: run 2 full fresh-water rinse cycles
- Replace the charcoal filter after every cleaning — Cuisinart recommends replacement every 60 days
How to Clean a Ninja Drip Coffee Maker
Ninja CE and CF series machines display a Clean indicator light when descaling is due. Their built-in Clean cycle runs longer than a standard brew cycle, with automatic soak pauses built in.
- Remove the permanent or paper filter
- Fill reservoir with cleaning solution
- Press the Clean button and let the full cycle run without stopping — the automatic pauses are intentional and important
- Run 2 fresh-water rinse cycles after completion
- Ninja officially recommends their own descaling solution (~$12) for optimal results — citric acid also works effectively
How to Clean a Mr. Coffee Drip Machine
Most Mr. Coffee machines use a straightforward standard brew process for cleaning — no dedicated clean button on basic models.
- Empty the carafe and brew basket completely
- Fill with 50/50 vinegar and water (or citric acid solution)
- Press Brew, let it run halfway, turn off
- Soak 30 minutes
- Complete the cycle, discard the mixture
- Run 2 full fresh-water rinse cycles
Mr. Coffee tip: For carafe stain removal, the rice method works surprisingly well — add a handful of dry rice with warm soapy water and swirl vigorously for 30 seconds. The rice reaches the curved bottom without scratching glass carafes.
How to Clean a Hamilton Beach Drip Machine
Hamilton Beach models vary by product line — check your manual for a dedicated cleaning mode. Most models use the standard approach:
- Remove all filters
- Fill with 50/50 vinegar-water
- Run a standard brew cycle with a 30-minute mid-cycle pause
- Complete, discard, run 2 rinse cycles
- Hamilton Beach warming plates accumulate baked-on drip residue faster than most brands — wipe while still slightly warm for much easier removal
Machines With Built-In Grinders (Cuisinart Grind & Brew, Ninja Auto-iQ)
The liquid cleaning process stays identical — but add these steps:
- Never use water inside the grinder chamber — wipe with a dry cloth only
- Run Urnex Grindz cleaning tablets (~$10 per pack) monthly through the grinder to remove oil buildup from burrs
- Replace charcoal water filters more frequently — fresh-ground beans release oils that accelerate internal contamination
Deep Cleaning the Carafe: Removing Stubborn Coffee Stains
Brown coffee staining inside a carafe is not permanent. Three methods, ranked by effectiveness:
Method 1: Baking Soda + Hot Water (Best for Glass Carafes)
- Add 2 tablespoons of baking soda to the carafe
- Fill with the hottest tap water available
- Soak 15–30 minutes
- Scrub with a bottle brush and rinse thoroughly
- Zero aftertaste — safe to brew immediately after
Method 2: Salt + Ice + Lemon (Best for Set-In Stains)
- Add 2 tablespoons coarse salt and 4–5 ice cubes to the carafe
- Squeeze in half a lemon
- Seal and swirl vigorously for 60 seconds
- Discard and rinse
The coarse salt acts as a gentle abrasive, the ice keeps everything cold and concentrated, and the lemon acid dissolves coffee compounds simultaneously. Sounds like a cocktail recipe. Works like proper chemistry.
Method 3: Denture Tablets (Best for Narrow-Mouth Thermal Carafes)
- Drop 2 denture cleaning tablets into the carafe
- Fill with warm water and let fizz for 20–30 minutes
- Rinse thoroughly — no scrubbing required, fits through narrow openings
Thermal carafe rule: Never put a thermal carafe in the dishwasher. High heat degrades the vacuum seal that keeps coffee hot. Always hand wash.
How to Handle Mold in a Drip Coffee Maker
Finding mold changes the protocol completely. A single cleaning cycle is not sufficient. Mold releases spores throughout the machine’s internal pathways during a brew cycle — one vinegar pass won’t reach everywhere.
Immediate response protocol:
- Stop using the machine — don’t brew through it first
- Disassemble every removable component
- Wash each part individually with hot soapy water, scrubbing any visible growth thoroughly
- Rinse each part with a 1:1 white vinegar solution and allow to air dry completely
- Run a full vinegar cycle at 60% vinegar / 40% water — let it run completely through without pausing
- Follow with 3 complete fresh-water rinse cycles
- Reassemble and run one final hot water cycle before brewing coffee
Preventing mold from returning:
- Never leave water sitting in the reservoir for more than 24 hours
- Leave the reservoir lid open between uses — always
- Empty the drip tray every single day — this is mold’s favorite location in the entire machine
- Never leave wet grounds sitting in the brew basket
Cost Breakdown: What Cleaning Actually Costs
| Cleaning Method | Product Cost | Cost Per Clean | Annual Cost (Monthly) |
| White Vinegar | ~$2/bottle | ~$0.20 | ~$2.40 |
| Citric Acid (bulk) | ~$10/bag | ~$0.30 | ~$3.60 |
| Commercial Descaler | ~$12 for 4–6 uses | ~$2.00–3.00 | ~$24–36 |
| Baking Soda | ~$1.50/box | ~$0.10 | ~$1.20 |
| Manufacturer Tablets | ~$15 for 6 | ~$2.50 | ~$30 |
Machine replacement math:
- Mid-range drip machine: $80–$150
- Lifespan with regular cleaning: 6–8 years
- Lifespan without cleaning: 2–3 years realistic
- Cost difference: 2–3 additional replacements = $160–$450 avoided
Cleaning with white vinegar costs under $3 per year. The return on that investment is genuinely absurd.
What Goes in the Dishwasher? (Quick Reference)
| Part | Dishwasher Safe? | Notes |
| Glass carafe | ✅ Usually | Top rack only |
| Thermal carafe | ❌ Never | Destroys vacuum seal |
| Brew basket (plastic) | ✅ Usually | Top rack only |
| Permanent mesh filter | ✅ Usually | Top rack |
| Carafe lid | ✅ Usually | Check for rubber seals |
| Drip tray | ✅ Usually | Top rack |
| Water reservoir | ❌ Usually not | Too large, may warp |
| Warming plate | ❌ Never | Electrical component |
| Machine body/base | ❌ Never | Contains electrical components |
When unsure — check your manual. A 3-minute hand wash is always safer than a dishwasher cycle that warps a plastic component or degrades a seal.
Maintaining Better Coffee Between Deep Cleans
Cleaning resets your machine to baseline. These habits keep it there.
Switch to filtered water. A basic Brita pitcher (~$30) or countertop filter significantly reduces the mineral content hitting your machine’s internals. In hard-water areas, this single change can extend your descaling interval from monthly to every 6–8 weeks. It also improves coffee flavor directly.
Replace the charcoal water filter on schedule. Most reservoir filters need replacement every 60 days. Most people replace them never. A fresh filter costs $3–5 and makes a measurable difference in both water quality and machine cleanliness.
Don’t leave wet grounds in the machine. Coffee grounds become a mold habitat within hours at room temperature. Empty the brew basket immediately after every single brew.
Dry everything before reassembling. Trapped moisture inside a closed brew basket or sealed reservoir is how mold starts. If you wash parts in the morning — let them air dry before closing everything back up.

Troubleshooting: When Cleaning Doesn’t Fix the Problem
You’ve cleaned properly. The coffee still tastes wrong. Here’s what to investigate:
Still bitter after cleaning?
- Check the showerhead spray holes individually — use a toothpick to clear blocked holes. Uneven water distribution causes over-extraction in some grounds even in a clean machine
- Your beans might be stale — a freshly cleaned machine reveals stale bean flavor more clearly than a dirty one that was masking everything with off-notes
- Brewing ratio — too little water for your amount of grounds causes over-extraction regardless of machine cleanliness
Still slow after cleaning?
- Run a second consecutive descaling cycle — heavy scale often needs two passes to fully clear internal tubing
- Switch to a commercial descaling product — for very stubborn scale, Urnex Dezcal or citric acid penetrates more aggressively than vinegar
- If the machine remains slow after two cleaning cycles: the damage to internal tubing may be permanent from prolonged neglect, and replacement becomes the practical answer
Vinegar smell persists after 2 rinse cycles?
- Run 1–2 additional fresh-water cycles
- Place an open box of baking soda next to the machine overnight — it absorbs ambient vinegar odor from the machine’s exterior
- Check the showerhead for pooled vinegar — turn it upside down and drain before reassembly
Machine leaking after cleaning?
- Check that all removable parts are fully reseated — the reservoir base connection is the most common post-cleaning leak point
- Inspect the reservoir connection gasket for scale residue preventing a proper seal — clean the seating area with a damp cloth before reattaching
Frequently Asked Questions
How do you clean a drip coffee maker? Fill the reservoir with a 50/50 mixture of white distilled vinegar and cold water. Run a brew cycle and pause halfway for 30–60 minutes to soak. Complete the cycle, discard the liquid, and run 2–3 full fresh-water rinse cycles. Wash all removable parts separately with warm soapy water. For daily-use machines, repeat monthly or whenever coffee tastes bitter or brews slowly.
How do you clean a drip coffee maker with vinegar step by step? Remove any charcoal filter from the reservoir first — vinegar destroys it. Fill with equal parts white distilled vinegar and cold water. Start a brew cycle and pause at halfway for 30–60 minutes. Complete the cycle and discard. Run 2–3 fresh-water rinse cycles. Do a sniff test before brewing coffee — any vinegar odor means one more rinse is needed.
What is the best way to clean a drip coffee maker? White distilled vinegar (50/50 with water, 30-minute mid-cycle soak, 2–3 rinse cycles) is the best budget option. Citric acid powder (1 tablespoon per quart of water) is the best overall method — it descales more effectively, leaves no odor, and requires only 2 rinse cycles. Commercial products like Urnex Dezcal are best for hard-water areas or heavily neglected machines.
How often should you clean a drip coffee maker? Rinse the brew basket and wash the carafe daily. Wash all removable parts with soap weekly. Run a full descaling cycle monthly in hard-water areas or every 2–3 months in soft-water regions. Check your water hardness with a TDS meter — areas above 121 ppm require at minimum monthly descaling to prevent performance loss.
How do you clean a drip coffee maker without vinegar? Food-grade citric acid powder (1 tablespoon dissolved in 1 quart of warm water) is the best vinegar alternative — it descales effectively with no smell and needs only 2 rinse cycles. Commercial descaling tablets like Urnex Dezcal also work excellently. Baking soda removes odors and oil residue but does not effectively dissolve mineral scale.
How do you descale a drip coffee maker naturally? The most effective natural descaling method is a 50/50 lemon juice and water solution — lemon juice contains naturally occurring citric acid that dissolves mineral buildup. Follow with 3 fresh-water rinse cycles to fully clear the flavor. Food-grade citric acid powder is also technically natural and works more powerfully.
Why does my coffee taste bitter after cleaning? Residual vinegar is the most likely cause — run 1–2 additional fresh-water rinse cycles before brewing. If bitterness persists after extra rinsing, check the showerhead for blocked spray holes that cause uneven extraction, verify your coffee-to-water ratio is correct, and check that your beans were roasted within the last 3–4 weeks. Cleaning sometimes unmasks stale bean flavor.
How do I know if my coffee maker has mold? Look for fuzzy growth in any color (green, white, black) inside the reservoir, brew basket lid, or drip tray. A musty or damp smell during brewing is a reliable early indicator. Slimy residue on reservoir walls or around the lid seal is another sign. If you detect any of these, run the full mold removal protocol — disassemble, hand wash each part, then run two consecutive vinegar cleaning cycles before using the machine again.
Can I make coffee right after a vinegar cleaning? No — always run 2–3 fresh-water rinse cycles first, then do the sniff test. Smell the steam from a hot water cycle or sniff the carafe. Any detectable vinegar odor means you need another rinse. Brewing coffee with residual vinegar in the machine produces an acidic, unpleasant cup that wastes the whole effort of cleaning.
Is it better to clean a drip coffee maker with vinegar or baking soda? Vinegar is significantly better for descaling mineral buildup — it’s acidic, which is what you need to dissolve calcium and magnesium carbonate. Baking soda is alkaline and works well for removing coffee oil residue and odors, but does almost nothing for scale. Use vinegar for descaling and baking soda as a complementary odor treatment if needed.
How do I clean a Cuisinart drip coffee maker? Remove the charcoal reservoir filter first — mandatory before adding vinegar. Fill with 50/50 vinegar-water. Press and hold the Clean button until the light glows solid. Let the extended 60–90 minute automated cycle run to completion without interruption. Run 2 fresh-water rinse cycles. Replace the charcoal filter — Cuisinart recommends replacement every 60 days or after each descaling cycle.
What happens if you never clean your drip coffee maker? Scale progressively lowers brewing temperature, narrows internal tubes, and reduces water flow — producing increasingly weak, sour, or bitter coffee. Bacterial and mold contamination in the reservoir creates health risks and persistent off-flavors. Machine components wear under the stress of restricted flow, shortening realistic lifespan from 6–8 years to potentially 2–3 years. Regular cleaning is the most cost-effective thing you can do for your machine.
Final Thoughts
Most “my home coffee tastes bad” problems aren’t about the beans, the grind size, or the water temperature. They’re about a machine that’s been slowly accumulating scale and rancid oil for months while its owner wondered why things keep getting worse. I was that owner. It’s a genuinely humbling moment when you realize the $40 bag of specialty beans you’ve been buying was being filtered through a layer of mineral crust and old oils every single morning.
My practical recommendation for 2026: Set a recurring calendar reminder for the first of every month. Use white vinegar if cost matters — $0.20 per clean is genuinely hard to beat. Switch to citric acid if the smell bothers you. In hard-water areas: clean every 3 weeks without exception. Run your rinse cycles properly. Wash the drip tray every single day.
That’s the whole system. Twenty minutes a month protects a machine worth $80–$150 for 6–8 years. For a coffee drinker who brews daily, that’s the highest-return maintenance habit in their entire kitchen.